
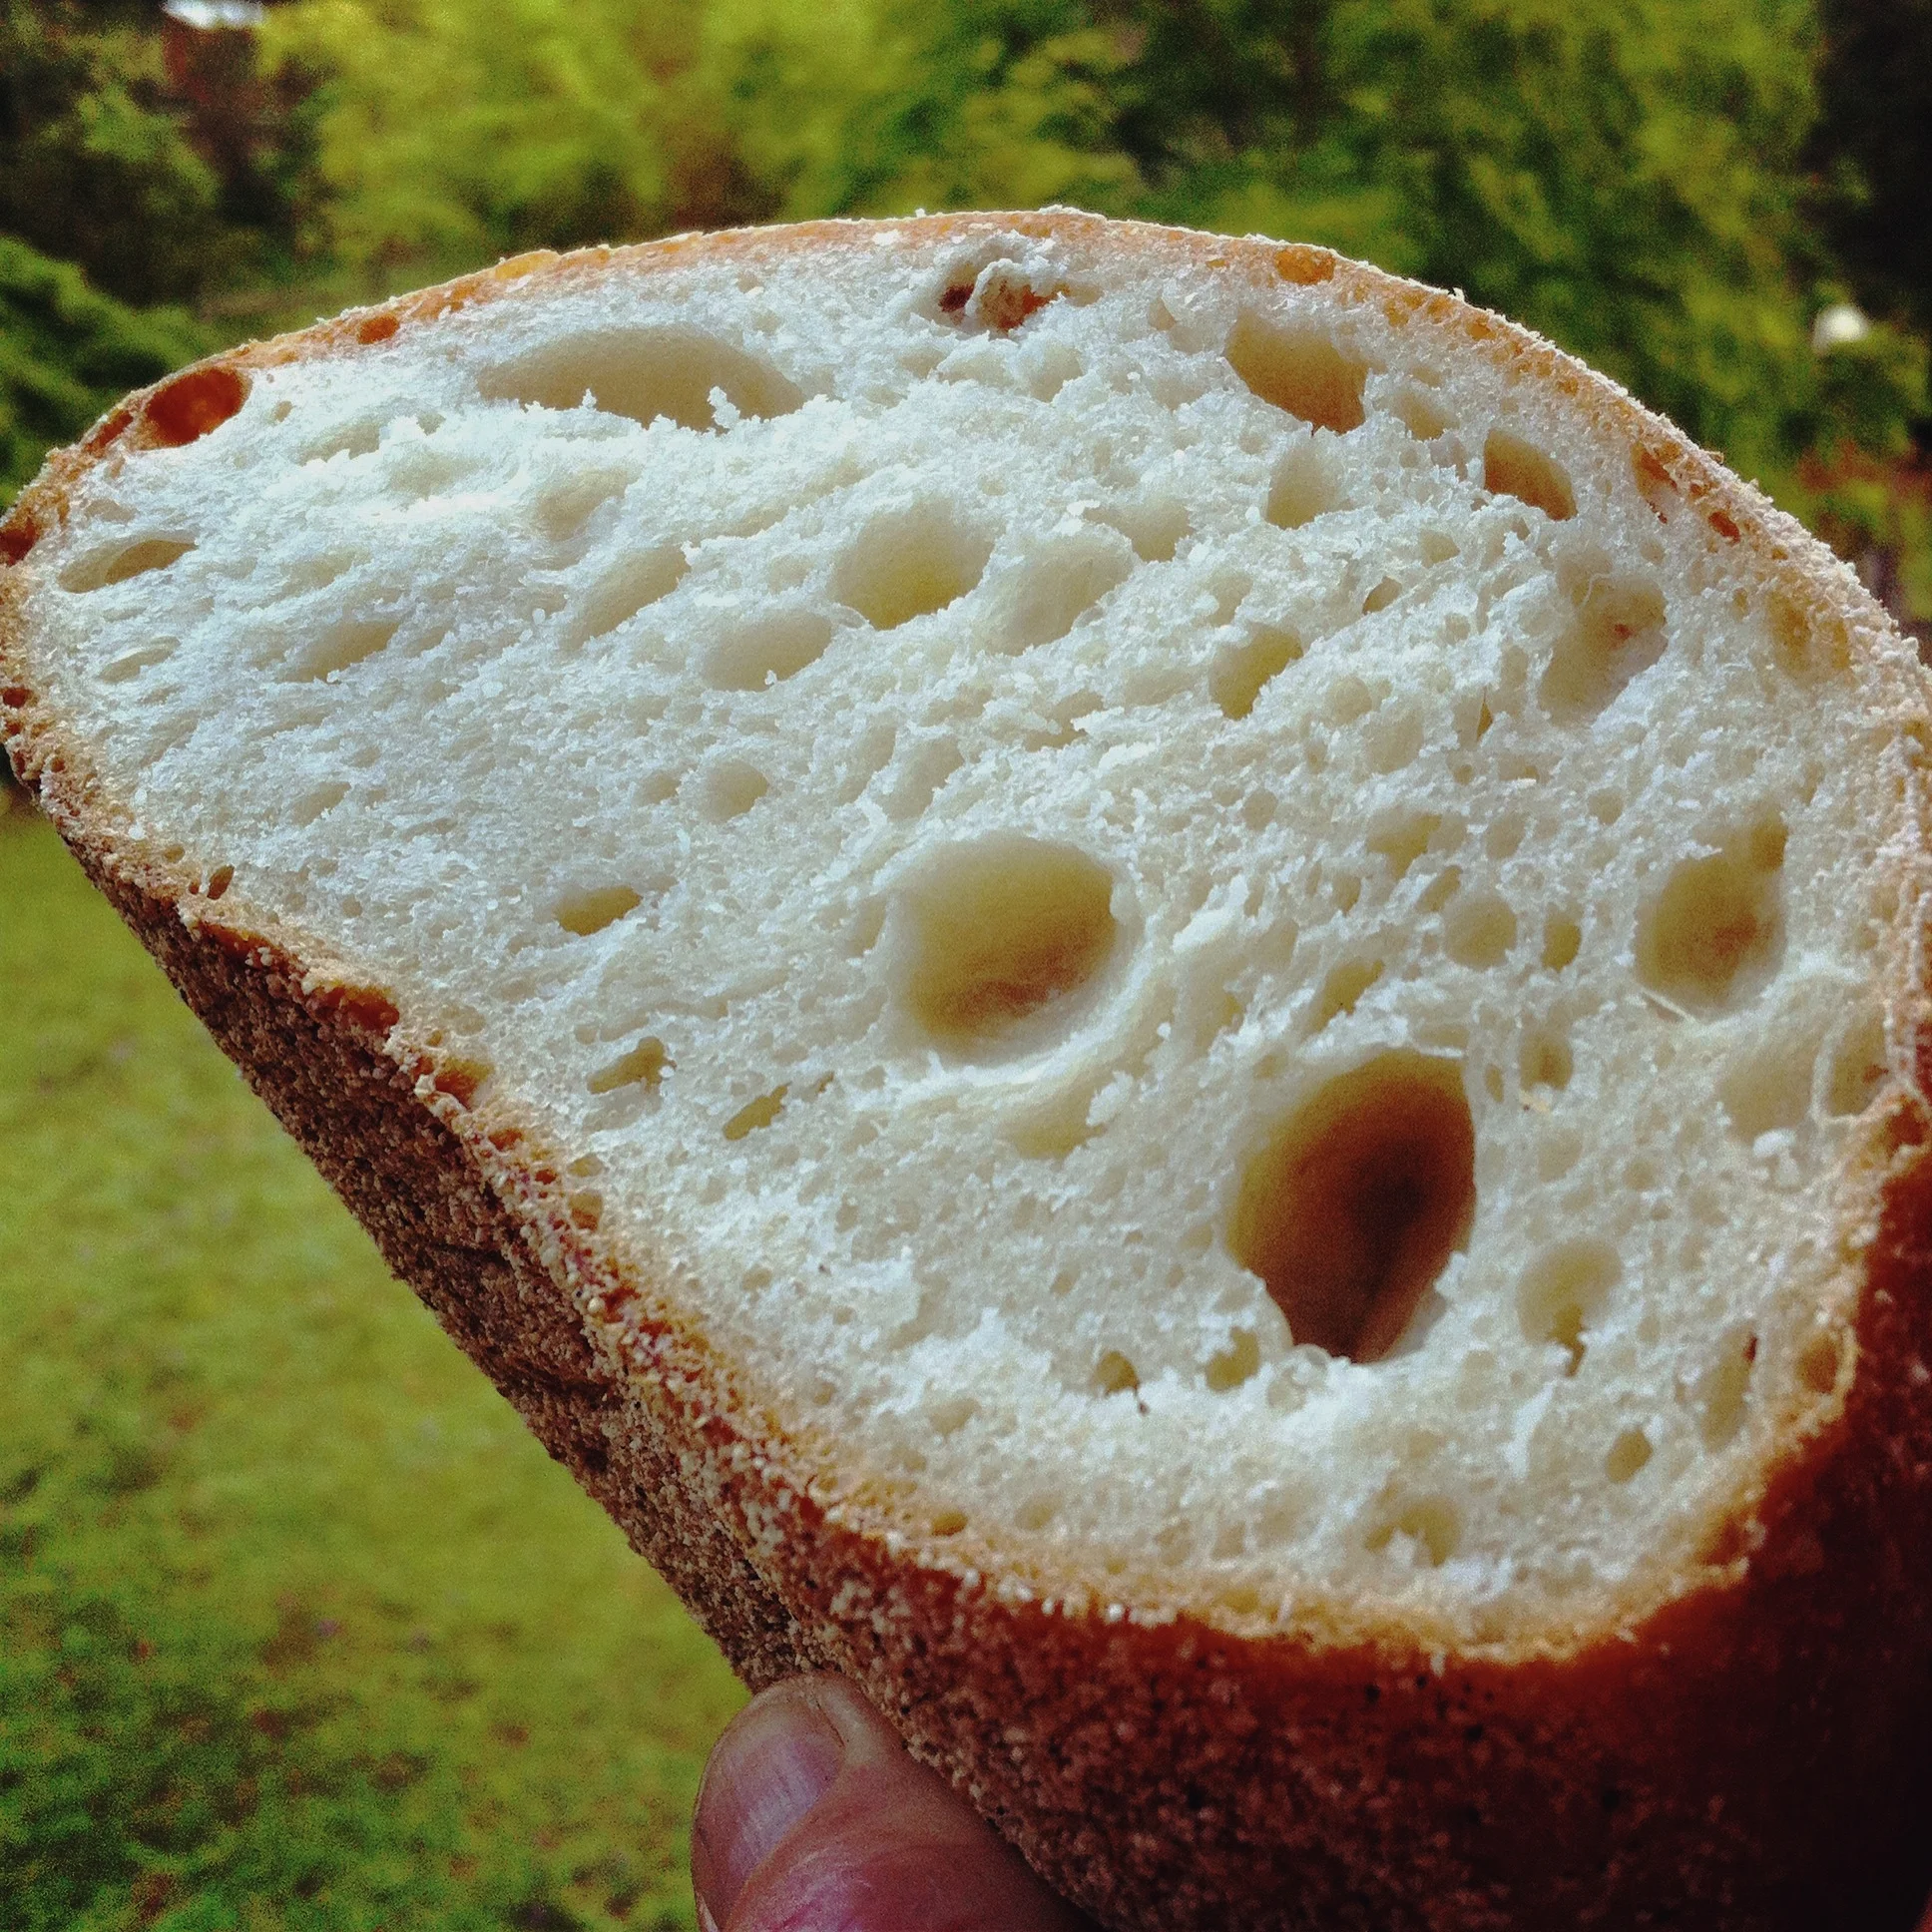
Open Crumb White Sourdough
This White Sourdough bread recipe utilises the 'dough starter' sourdough method. If you don't have starter in the dough form, it can be purchased here. This bread will happily be baked in a tin, or on the sole (hearth) of the oven.
Here’a a video I made a while back which shows this recipe:
Baking on the sole will really help you to get that big open crumb.
There are different ways to make bread using a dough starter, or desem, and the way i've settled on here is one way only - and I choose it because it's easy to maintain, and because of its resilient nature. It also has an absolutely distinct flavour, and if you are a long term sourdough propeller head like me, you'll appreciate it straight away as being one of a kind, as all good ferments become over time. The longer, the better!
You'll need:
1200g of white roller milled wheat flour (fine flour. Coarsely milled and sifted flour, even if it’s white, won’t give you a nice open crumb).
20 - 100 grams (approx) of dough (desem) starter (less for long fermentation, more for short)
700 - 800 mls of water
20 - 30 grams cooking salt
You'll also need:
Thick (heavy duty - not a salad whisk) whisk or fork. Whisk is best. You can get great small ones at kitchen stores.
Like other dough starter recipes, this one does best with a fair bit of bench work - baker's speak for kneading. If you are lazy, there are some shortcuts, which I'll explain as I go along.
The easy way to knead dough by hand is by quite a few short bursts of activity over a few hours. You can be doing something else at the same time, like writing your book, for example. The breadmaking is quick work, just a few repeats. Awesome, awesome bread awaits!
METHOD:
Mix the dough starter with 500ml of water. The water will become cloudy with little lumps through it. Allow to stand for ten minutes. This will help the starter to soften. Whisk a couple of times to help the starter disperse. You will end up with a milky consistency. Little lumps are okay.
PREFERMENT:
Add 500g flour. Whisk it or use a potato masher to form a soft, shaggy ‘sponge’. Leave this to stand until it has a lot of bubbles. In warmer weather, this will take at least a eight hours. I often leave it out of the fridge to get going, and then put it in the fridge for up to a full day. Times are very flexible, especially when you compare winter to summer. You want your sourdough sponge to be nice and bubbly if possible.
If you want to learn more about prefermentation, there’s another article with more info about the process a here.
FROM 'SPONGE' TO 'DOUGH':
Slowly add the remaining flour and then water to the ripened sponge. It’s a good idea to reserve a tiny bit of the water so that you can use it to help the flour into the sponge, a little at a time.
Once the flour and water have been combined, you have what bakers call a 'shaggy dough'. This can be left to stand for about half an hour to two hours, but no longer. This will save kneading - what will happen is called 'biological development', which is where the chemical action of the enzymes in the preferment act on the flour to strengthen gluten, while simultaneously, a bacteriological fermentation occurs. It's all a bit magic. I've written a small book or two on this now. One of them is here.
Please note: this process, also known in some circles as 'autolyse', provides gluten development benefits, but actually destroy development if left to occur for too long. Acidity climbs very quickly when the starter is in the preferment (sponge) as it is in this formulation. In warm weather, let the shaggy dough rest in the fridge.
When it's rested, spray or wipe the shaggy dough with water, then sprinkle on the salt. The best way to get the salt into the dough is to push it through the dough with your fingers at first. Then, as the dough comes together, start kneading it into a large ball.
Take it out of the mixing box or bowl, and give it a good knead on the bench.
Rest the dough for about fifteen minutes, either in a plastic dough box or in your bowl, covered so that the dough doesn't crust. Repeat the whole kneading process. The more development you can do, the better the bread will be.
If you find the dough is tearing when you knead it, rest again before more work is done.
Place the fully kneaded dough back into the dough box with the seam at the bottom, cover and rest.
Kneading, then resting for fifteen or twenty minutes, then kneading again, really helps you to get good gluten development into the dough when you are working it by hand.
Once you have put a number of kneading sessions into the dough, allow it to proof for at least four hours out of the fridge, or up to twenty four of hours in the fridge.
GENERAL KNEADING TIPS:
The more kneading you can get into the dough, the lighter your finished bread will be. You will notice that with each successive knead, the dough feels shinier, silkier and more elastic.
Once the dough begins to feel slightly stick or tacky, that's about it - after this point, all your efforts will have a negative effect. Leave it alone now. It will recover.
If a dough is really soft (that is, if it runs all over the bench in only a few minutes after kneading) you may find that adding a little sifted or 'flung' flour over the dough will make it easier to handle. Even just dipping your fingertips into flour before handling a soft dough can make a world of difference.
If you choose to go for a really slow fermentation, try halving the amount of starter in the recipe.
After the first proof, no matter whether it's four or up to twelve hours, your white desem dough will be ready to be cut and rough rounded.
SECOND (middle ) PROOF
Remove the dough from the box or bowl it's in. Place it on the bench, and simply divide the dough evenly in two. You can weigh it, or use your eye.
Round the chunks or dough. Spray with water and leave on the bench. You can also put the balls of dough back into the box to prevent them from skinning. You can allow the balls to second proof at room temperature, or pop the box back into the fridge to be moulded into shape in twelve to twenty four hours.
MOULDING AND THIRD (FINAL) PROOF
Whether you have chosen to rest them on the bench or in the box, they will need to have doubled in size. Allowing them to fully 'gas' is very important. Then pick up each ball of dough using only the outsides of your hands, cupping the dough like a bowl with your hands underneath. I guess you could say it is a bit like holding a book in your palms. Stretch the face of the dough to begin a cylinder shape, and simply squeeze the base together with the outside edges of both hands.
Spray the doughs with water, and dust with semoilina or rice flour. Slash as you normally would.
Place on flat baking trays, allow to proof (in boxes, as usual) until quite large and not resisting being poked with a little fingertip. If you're heading for the 'sole' of your oven, you can let these babies get massive before baking, because the 'kick' will be large.
You will get an amazing rise from this bread. The crumb, when it's baked, will glow - because of the development that you will have achieved from so many kneadings.
The white desem dough will rise a great deal from the final turn, and I found that I could literally proof it until it was almost overfilling the trays I used. Even when I proofed them for what I thought would be well and truly long enough, they still kicked out sideways in the oven, indicating that they could have even gone further! This bread will give a big oven kick, if you've mixed and turned the dough correctly - so it might take a couple of attempts making this recipe to understand how much oomph there is in the dough.
If you've really got this dough right, though, and you have a pizza stone or hot tiles in your oven, you can proof this dough for an really, really long time, and it will hold its shape in a batard no worries at all. It loves a good sole bake!
BAKING
As a default setting, I preheat my oven to 250 degrees celsius for all breads baked on the sole. I use a large terracotta tile for setting my dough on in the oven, and I find I have to run my oven for about an hour to really get the heat going before I bake. Depending on variable circumstances, total bake can be from 30 minutes, up to an hour.
I think this bread is best made with a leathery crust, but however you like your crust, it is an utterly delicious style of sourdough. I have to say that I've tasted a lot of sourdough bread in my time, and this one is up there for flavour. It's complex, delicate, earthy and subtle, all at once. Quite an achievement.
If you like this style of bread, and want to learn how to make it in a workshop setting, why not check out our sister website, the School of Sourdough. It has details of all the upcoming workshops, which are specifically about hearth baked, naturally leavened sourdough using the method outlined here. Our School is located in the beautiful Hunter Valley of NSW. Why not come up and make a weekend of it? There is plenty to do in the Hunter Valley for everyone, with wineries and so forth only ten minutes from us!
If you would like to know more about baking on the sole, I’ve written a handy little e book you can download or get in the mail from Amazon. Here’s the link to purchase or check out Sole Baking for Simple Folk.
If you need to get some starter to get started, you can follow this link to buy live desem sourdough starter. We freight within Australia for free. We can’t freight overseas due to various international and country laws.